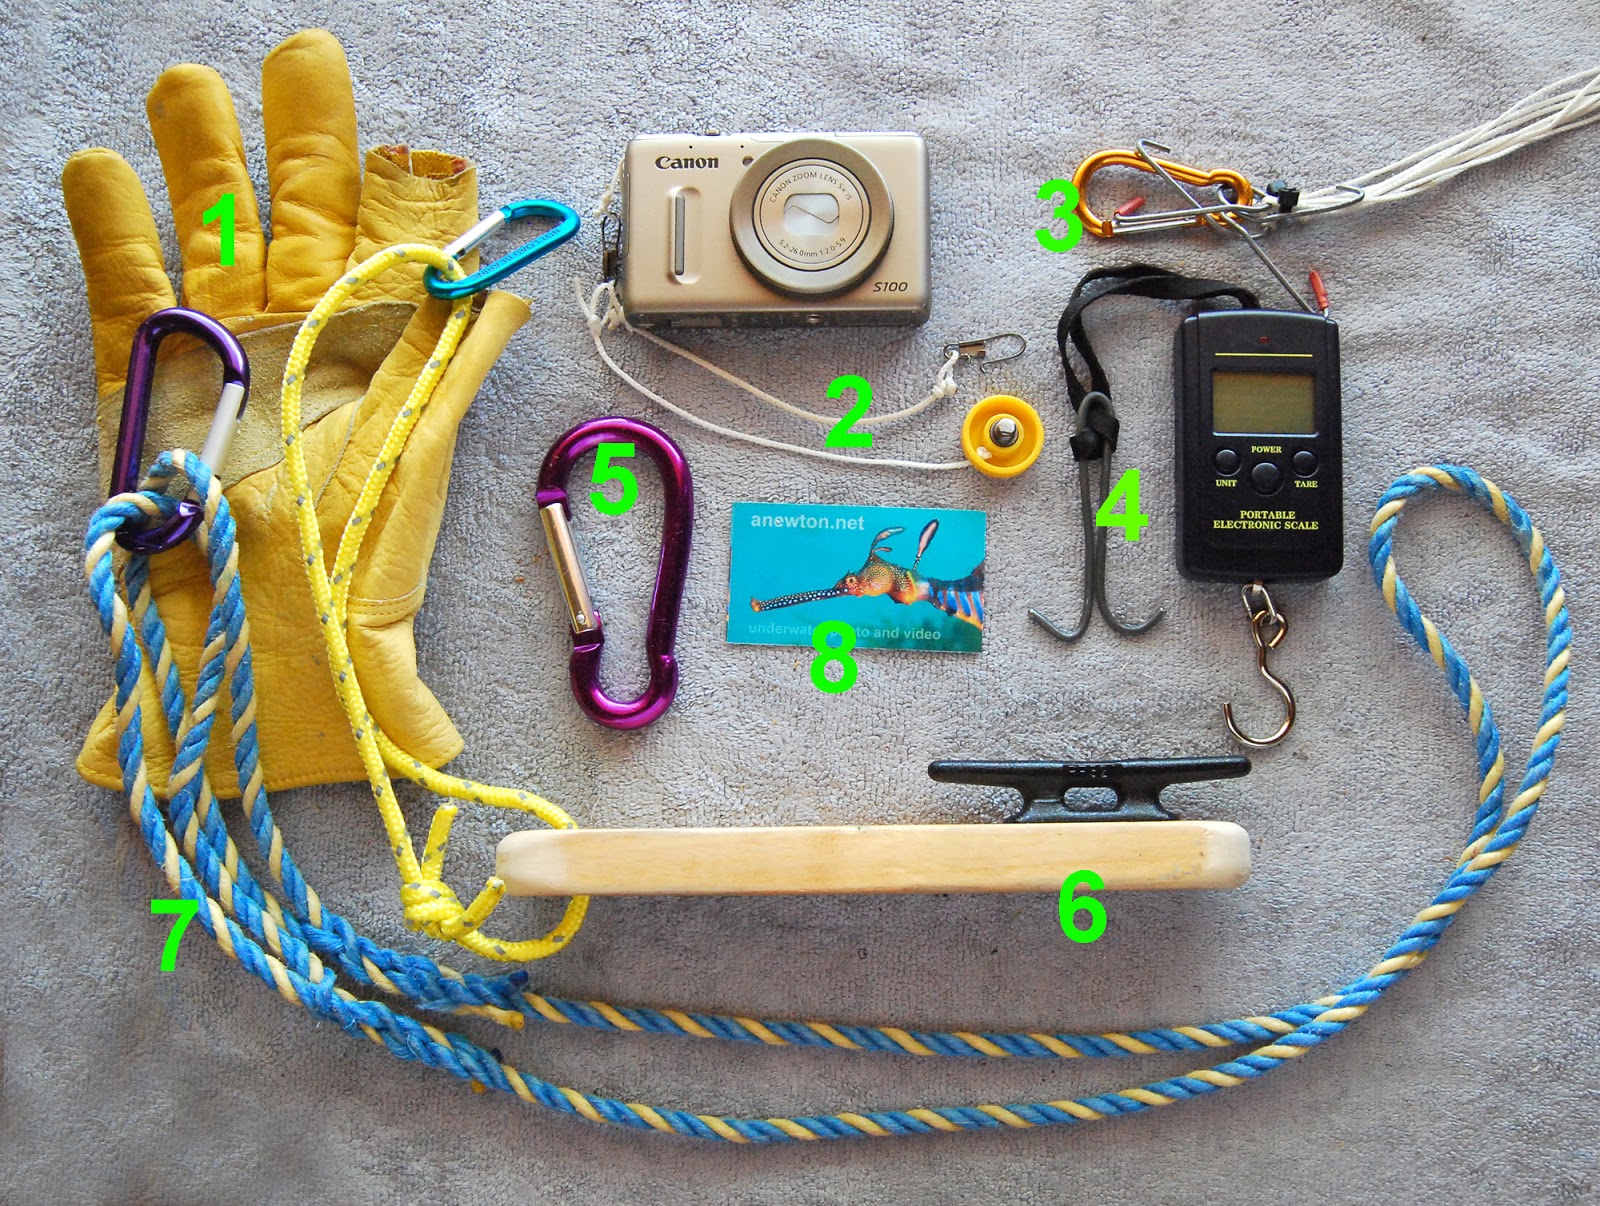
 1. Leather gloves for the dominant hand with pointer finger and thumb tips cut off.
The kites we use produce strong pull on the line. With that comes the very real risk of cuts and burns from fast moving line. Gloves are essential, no question.
2. Lanyards for the camera and mounting bolt.
I connect the camera tether to the picavet lines, that way if any part of the rig fails the camera won't plummet to earth but dangle from the lines. A forgotten mounting bolt would be the most common reason for an unsuccessful KAP outing.
3. Carabiner to store the picavet lines.
These line hooks are like grappling anchors and with the picavet lines will very easily twist and tangle. The picavet lines are wrapped in a figure of eight around the picavet cross after connecting the line hooks as shown.
4. Luggage scale with gamma hook to measure line pull.
This gives me an idea of which camera rig is suitable for the kite and wind strength.
5. Big carabiner to walk the kite down.
Sometimes when there is enough space you can walk the kite down by clipping this big carabiner to the kite line and walking towards the kite.
6. Kite cleat for securing the kite line when using the skate wheel reel.
Also called a Henry's handle I think. A few figure of eight wraps of line around the cleat will hold the kite. I can either clip the kite cleat to my backpack, which I always wear, or to a tree or post using the longer loop.
7. Longer loop of rope with carabiner to tie off the kite cleat or strato spools.
This is long enough to wrap round something solid like a tree, rock or car tow ball.
8. Website card.
Because people will be drawn to you while flying big kites with "what is that" dangling from the line, and it's good to be able to direct them to your website to share the results.


