The picavet system does a good job of keeping the camera level, except for light rigs in strong wind. Light rigs can suffer from blow-back where the wind blows the rig back away from the vertical.
You can see how the camera is angled compared to the horizon in the left photo, which would result in many unusable tilted shots. The effect is greater up higher in strong wind and when the camera is side-on.
The right photo shows the camera pre-angled to counteract the blow-back effect resulting in a higher number of level shots.
This is only possible with a rig that allows the camera to rotate from landscape to portrait orientation.
400g Aurico pan rig in Bft 5 (18kn).
The picavet cross on my basic GoPro rig has extra mount hole positions allowing the camera to be mounted off centre for the same reason.
Once I knew my kites could lift the SLR it was time to add some AuRiCo.
This rig was to be another limited pan, manual tilt style, which involved some very simple shed tinkering.
Just had to bend up some aluminium as a pan bolt bracket and rivet it on to the top U. This bracket steadies the pan bolt which is no longer solidly fixed to the top U but rotates.
The bracket also acts as the pan servo mount so I had to think about how far away from the pan bolt the servo needed to be positioned. That distance depends on the thickness of the servo and which gear cogs are used.
Nikon D80 SLR AuRiCo autoKAP rig - 1195g
To keep the rig as simple and light as possible I used velcro and rubber bands to hold the AuRiCo and batteries on.
As the pan servo is only rotating the rig it doesn't need to be too big or securely bolted on. I started with a Futaba S3003 but ended up using Turnigy 380MG stuck on with double sided tape and cable ties. Although the servo is moving over 1kg of camera and rig there is a lot of give in the picavet suspension setup.
You can see in this video how the load transfer from servo to rig is quite spongey which reduces strain on the servo. The servo moves the picavet on its lines first then the rig swings around.
I recently upgraded to a Nikon D7000 for underwater photography so my original SLR, a Nikon D80, doesn't get much use these days. To reward the D80 for reliable long service and paying for itself many times over I thought it might like to go flying.
It's not the ideal KAP camera being quite heavy (672g body + 202g 18-55mm lens = 874g all up)
and it doesn't have an intervalometer but that didn't stop me. James Gentles makes a lovely little device called GentLED-AUTO which is an IR remote intervalometer weighing just 20g. I just happened to have one sitting around so it was time to give SLR KAP a try.
First step was to make a basic manual rig just to see if my kites could lift it.
I bent up some aluminium to make a rig similar to the vertical style Aurico autoKAP rig for the Canon S100. But this design, a single vertical support with an L bracket to mount the camera, was way too flexible for the heavier SLR. The spring like flexing would have had the camera bouncing up and down continuously.
Nikon D80 manual rig - 1090g
So I had to revert to the tried and tested double U style. This allows a light and stiff rig to be built using the minimum of material, but it means I needed to balance the camera in the bottom tray carefully following James Gentles guide, which I find much trickier than building the vertical style rig.
The bottom U tray needs to be wide enough, front to back, to accommodate the camera mounting bolt and the pivot holes on each side which are at the centre of gravity for the camera. With this camera/lens combo the centre of gravity is 24mm forward of the camera mount hole. The bottom U needed to be 40mm wide. The top U only needed to be 30mm wide to be stiff enough.
Amazingly the wind was perfect for a test fly on the day I made this rig. Sunny with a smooth onshore 12kn and the Levitation Delta had no problem lifting it all as shown in this video.
I was really pleased with the image quality compared to the Canon S100 partly because the heavier rig isn't blown around by the wind as much.
I have begun to realise that lighter rigs suffer from blow back resulting in angled horizons or more/less tilt than expected. I'll talk more about blow back soon.
I mentioned in a previous post, Proportional pan servo, about changing the transmitter control sticks for dial pots or variable resistors.
That meant I could set up the rig so the camera orientation directly related to the position of the pan and tilt controls. You always know where the camera is pointing by looking at the dials.
This video shows how it was done.
It was surprisingly easy with all the components unplugging and plugging back in. I just needed to cut the plugs off unused levers to reuse on the pots. This RC set is 4ch and I only needed 2ch.
I first measured the resistance of the lever pots and got values ranging from 1k to 2k. Folks on the KAP Forum had used 5k successfully so I bought 5k and 1k. Both worked and gave the same range of servo movement.
I got sick of trying to juggle the reel and transmitter at the same time so decided it would be better to move the control knobs off the transmitter to a hand held extension cord. Now the transmitter stays in my pack and the controls dangle over my shoulder within easy reach.
This was easy, really just adding longer wires to the pots.
AutoKAP rigs move in a pre-programmed way without any input from the kite flyer. Unlike the RC rig you can fly the kite and just let the autoKAP unit control the camera movements.
There are a few autoKAP electronic modules available but I use AuRiCo (Automatic Rig Control) by Peter Engels, another clever KAP electronics inventor. Using 10 dip switches you can pre-program tilt, pan, shutter function (and CHDK USB input) The AuRiCo unit replaces the RC receiver.
In normal use you would need a continuous pan servo, a normal tilt servo and maybe a shutter servo (if you don't have an intervalometer) You can select the time of pan rotation (0.2 to 1.3 sec. Your gearing then determines the angle of panning) and the interval between movements (5 to 240 sec) and the number of tilt movements (0 to 4 tilts from 0º to 70º down)
So you could set the rig to - shoot, tilt down to 15º, shoot, tilt down to 45º, shoot, tilt down to 70º, shoot, pan for 0.4sec and tilt back up to 0º and keep repeating. This covers all angles but most of the time I like to target a specific view.
Canon S100 AuRiCo pan rig - 400g
So the way I use it is to plug an un-altered pan servo into the tilt socket giving me a 4 shot repeating pan. With 4:3 gearing the rig pans through 90º.
The chassis in this photo is 25mm x 1.6mm aluminium. I have since changed to 20mm al and done away with the AuRiCo case to bring the weight down to 400g.
I have found with my manual rig that aiming can be off and I often miss the target.
This panning rig gives me a much greater chance of capturing the intended target and allows the possibility of panoramas.
The Lumix LX3, a superior compact camera, was soon to be reclaimed by it's rightful owner (wife) so it was time to find a replacement.
Using the camera feature search on DPReview I looked for any compacts with 24mm wide zoom and intervalometer to replace the shutter servo. The only camera currently available fitting the search was the Lumix LX7 weighing 298g, a little too heavy for light weight KAP.
An alternative option was to add intervalometer function to a Canon compact using the CHDK firmware hack. The Canon S100 looked interesting, with GPS, only weighing 190g and A$100 less than the Lumix.
DWI had the S100 for A$280 which was fine by me. I tend to think of KAP cameras, like underwater cameras, as expensive disposables.
Canon Powershot S100 RC rig - 460g
I am finally happy with this setup.
- CHDK/SDM intervalometer (explanation coming soon)
- Proportional pan and tilt using Turnigy 380MG mini servos
- Brooxes compact picavet and tripod bolt from the KAP shop
- Fibreglass face plant protection bar
- Safety leashes on the camera and tripod bolt
A more logical method for pan is to use a larger gear on an unaltered servo with a smaller gear on the pan bolt. With the correct ratio (5:2 in my case) you can achieve +/- 180º rotation (=360º) from a +/- 45º servo.
Also by changing the transmitter pan lever for a rotating pot or variable resistor (more about that later) you can make the rig pan position match the transmitter pan knob position.
This means you always know which direction the camera is pointing by looking at the transmitter pan knob.
A note of caution. Small movements of the pan knob give large movements of the rig. You need to be prepared for a sudden rotation of the rig when it is turned on. It's a good idea to turn it on to align the rig before hanging from the kite line and with no tension on the picavet. This way the picavet will spin on start up rather than the rig.
In the never ending quest for a lighter rig I tried some metal geared micro servos. The tilt servo directly supports the camera so it needs a strong metal spline.
This first servo I tried was a Turnigy TGY 113MG servo weighing 12g (a Futaba S3003 weighs 36g) and has metal gears and spline. Torque rated at 1.8kg/cm.
Unfortunately it was not strong enough to tilt 270g of camera, cradle and shutter servo without breaking into crazy jittering, shown in this video.
Even making sure the camera and tray were accurately balanced didn't improve the jittering.
I needed to find a light mini servo with more torque.
The Turnigy 380MG mini servo, 16g weight and 3.5kg/cm torque turned out to be the answer. It has a funky see through purple casing, standard Futaba sized spline with 3mm thread and no jittering.
The Flickr KAP gear group is a fantastic resource for researching rig designs. There are many different styles of backyard and commercially made rigs but the one that really caught my eye was this one by Eric Kieboom.
Made for the Lumix LX3 using 4mm carbon fibre tube and various aluminium profiles it weighs almost 300g lighter than my first effort. As soon as I saw it I decided to ditch the heavy al rig and use carbon fibre tube. Back to the shed.
Lumix LX3 Carbon fibre tube RC rig - 600g
Here is my first version. The biggest challenge was finding the small aluminium extrusions. The square profile used on Erics corners and pan bolt support was not available in Australia. So I used 10mm tube which made accurate parallel drilling very difficult. Carbon fibre tube is available from Carbon Fiber Australia through their online store. 4mm x 1m tube A$5.95 each plus A$10.45 post.
Eric used CA glue (superglue) but I had some problems getting good adhesion so changed to epoxy.
I also bought a 4ch 2.7GHz radio from Hobbyking.com for A$28 (it works perfectly!) and added a mini servo for the shutter. The plastic mount for the shutter servo slots into the camera hotshoe and flexes when the servo pushes down. This prevents over stressing the servo.
This video shows it in action.
All up weight now 600g with 4 x AAA batteries. More weight could be saved by using mini servos.
At the other end of the complexity range is the full radio controlled rig which is heavier than a manual rig because servos, receiver and batteries are included.
Panasonic Lumix LX3 Aluminium RC Rig - 745g
This was my first RC rig, made from 3mm x 35mm aluminium resulting in a flying weight of 745g. (Flying weight includes everything hanging from the kite line)
The LX3 does not have an intervalometer or IR remote so the only way to shoot is by pushing the shutter button.
My existing Futaba radio was only 2 channel but I needed tilt, pan and shutter control. I devised this system using one servo for two controls, down to move the pan ratchet and up to shoot, with the other channel for tilt. I used standard Futaba S3003 servos and 4 x AA batteries resulting in a rig that worked but was way heavier than it needed to be.
A stiff breeze was required to lift the rig with constant tweaking to keep the pan/shutter link working.
Building this rig was a good learning experience. The first lesson learned was that 3mm Al is way too thick. 1.6mm would be plenty strong enough.
Soon after completion I saw a carbon fibre tube rig and decided that was what I had to build next.
Over the next few posts I'll explain 3 different types of KAP rig starting with the most basic manual rig.
The camera mounts onto a simple tilt/pan bracket, which must be pointed in the right direction before launching. Photos are captured continuously using the intervalometer or timelapse function.
The S100 is not supplied with it's own intervalometer so the CHDK firmware tweak is necessary. The mounting bracket is 20mm x 1.6mm aluminium.
Camera and rig need to be balanced for the rig to hang perfectly level. Positioning of the tripod mount hole, picavet bolt hole and tilt axis are important. Here's a page explaining how to find the centre of gravity written by James Gentles, a very clever KAP electronics inventor.
Manual rigs are the simplest and lightest setup allowing KAP in light winds and with the least stress. Great for targeting a specific subject but pre-flight aiming needs to be accurate. The camera must be retrieved to make orientation changes.
This is my favourite rig, very light and simple. In a steady 5kn+ wind the Levi Delta will lift it with hardly any pull on the line. I can walk around to position the camera where I want it and easily wind in or let out line.
GoPro HD2 manual rig - 260g The GoPro with a tripod adapter bolts directly to the picavet upside down and images are inverted via GoPro menu selection. More than one mounting hole on this picavet allows the rig to be levelled for different camera tilt positions.
This is my lightest rig weighing 260g, used for flying from a dive boat and in light or unreliable winds. The camera is tough and well protected in its waterproof housing and has a fisheye lens. I tend to crop and "defish" the images in Photoshop for a more realistic result.
This rig could be made lighter still by removing the filter holder, but it is needed to hold a flat filter to allow underwater focus.
To lift a camera you need a big kite with lots of pull. It also needs to be a steady flier and there are a few designs renowned for their KAP-ability.
PFK Nighthawk
The Paul's Fishing Kite (PFK) Nighthawk delta is designed to fly in winds as strong as 30kn. Most other kites would be looping and crashing by then. It has large trailing edge flaps, strong flexible fibreglass spars and a hardwood spreader. The KAP community has adopted the PFK as the strong wind specialist, but it will also lift lighter rigs in normal wind strengths.
This is my favourite kite, it just wants to fly and keep on flying no matter how strong. Tail usually not required but may calm it down a bit in strong winds and reduce overflying.
Lifting range
480g RC rig in 12kn - 30kn+
270g GoPro rig in 6kn+
NZ$140 from Paul's Fishing Kites - New Zealand
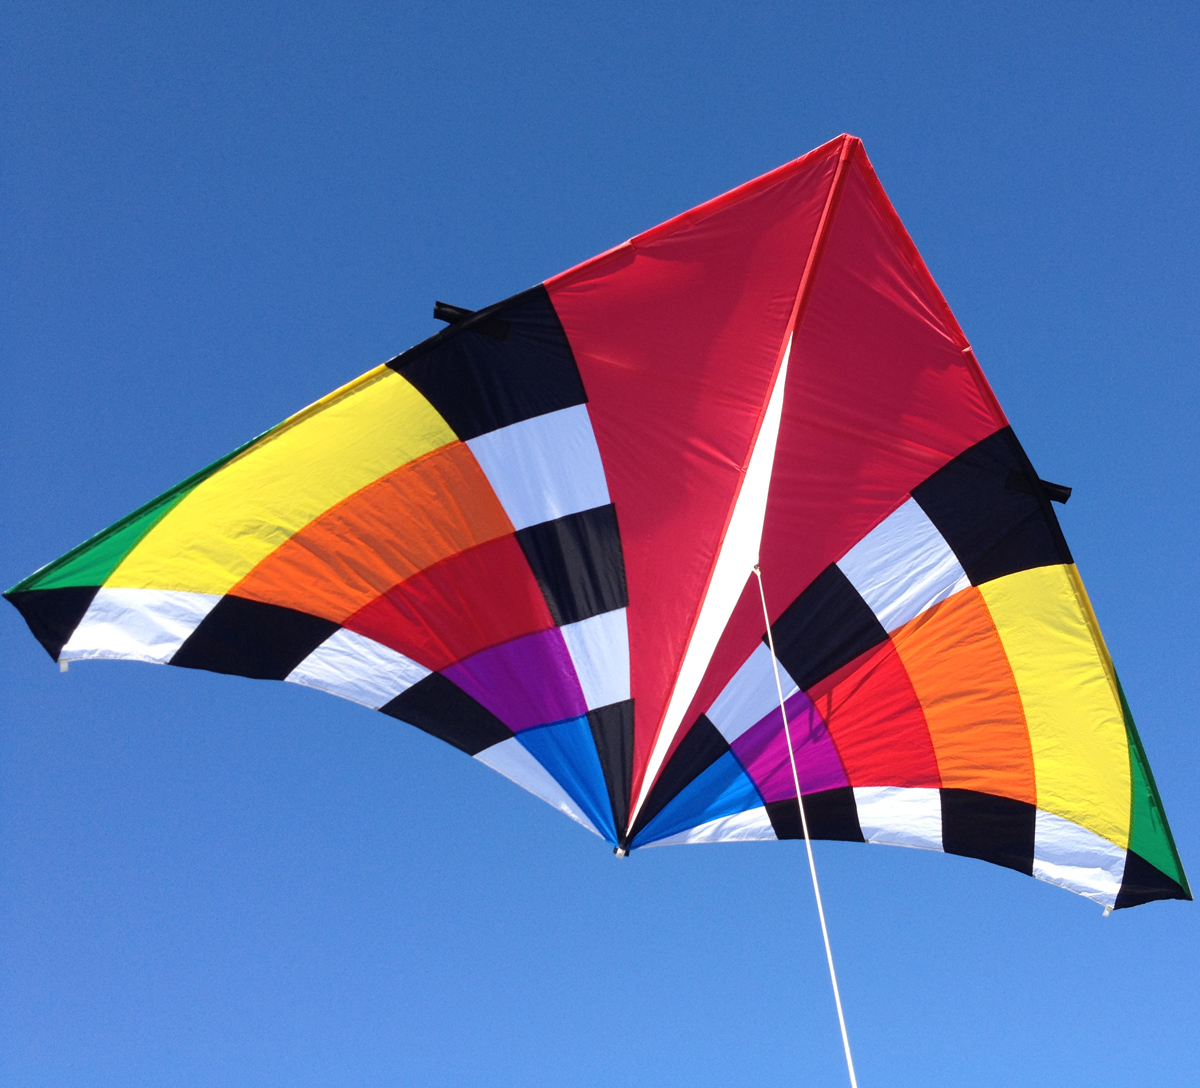
ITW 9ft Levitation Delta
For lighter winds 5kn -17kn, this big delta from In-to-the-Wind is my choice and a favourite of many KAPers world wide. It has more pull than the PFK but also starts to fly to the side and do power loops in wind speeds above it's range.
Flies at a very high angle and even over-flies in light puffy wind and hot days. Adding a tail reduces overflying and gives steadier flight. I use a 3m long tube tail.
Lifting range
480g RC rig in 8kn - 17kn
270g GoPro rig in 5kn+
US$75 from Into the Wind - Boulder Colarado
PL Pilot 2m2
This 2.0 square metre parafoil is made in New Zealand by Peter Lynn Kites. Peter Lynn is famous for making some of the world's largest kites.
Parafoils have no spars and pack up into a small stuff bag. They have strong pull but fly at a lower line angle like 50º
Flies well without a tail but everyone else says they use one. May calm down side to side swaying.
Lifting range
480g RC rig in 10kn+
270g GoPro rig in 6kn+
NZ$96 from Peter Lynn Kites - New Zealand
Cody Box Kite This was the first kite I bought for KAP and it was not all that suitable. Above about 16kn it flies out to one side and power loops. It has a narrower wind range than the above kites and take more assembly time but does have good pull. KAP range 8kn - 15kn
However it is an interesting kite in the sky and attracts attention. It flies well enough within its wind range.
This what you get when you add a camera to a kite, maybe some radio controls or electronics and lots of shed tinkering time.
Images captured by kite give a rarely seen perspective, on a more intimate or human scale than traditional aircraft aerials.
There is a very active world wide online community of KAPers and some seriously clever inventors producing electronics, rig and camera control scripts and mechanical bits for KAP rigs.
Kites Big stable kites are needed to lift the camera and rig. KAPers usually have a range of kites to cover different wind speeds and camera rig weights. More about that later.
Cameras
The lighter the better obviously. GoPro, Canon compacts and even small SLRs are popular. Mirrorless large sensor cameras are starting to feature too.
Canon compacts can also be enhanced via CHDK (Canon hackers development kit) and SDM (Stereo Data Makers) firmware changes. I'll write more about these later but basically some very clever programmers have written firmware enhancements which add functions such as intervalometers, RAW, HDR and bracketing.
KAP rigs
There are many different styles of camera rigs for kite aerial photography. Here are a few of the main types.
RC KAP - using radio control to operate pan and tilt and maybe shutter release.
Auto KAP - using pre-programmed electronics to replace the radio controls. AuRiCo (automatic rig control) is what I use. The rig performs a repeating sequence of tilts, pans and shutter releases by itself.
Manual KAP - where you set the camera orientation and shooting interval before launching. The kite needs to be brought down to make any camera changes.